Changing Sloped Yards into Functional Outdoor Living Spaces
Building a paver patio with retaining wall is the perfect solution for changing a sloped yard into a beautiful, functional outdoor living space. This integrated hardscape approach combines structural support with smart design to maximize your property's potential.
Quick Overview: Building a Paver Patio with Retaining Wall
- Site Assessment- Evaluate slope, soil, and drainage.
- Design Planning- Layout patio and wall dimensions.
- Excavation- Dig trenches for the wall foundation and patio base.
- Wall Construction- Install a gravel base and blocks with a proper drainage system.
- Patio Installation- Add a compacted base, sand bed, and pavers.
- Finishing- Install edge restraints, polymeric sand, and capstones.
This construction method can increase usable outdoor space by up to 50% on sloped properties while providing essential soil erosion control. Well-designed hardscaping projects often recover 100-200% of their cost at resale, making this both a functional and financial investment.
The combination addresses multiple challenges at once: preventing soil erosion, managing water drainage, and creating level surfaces for outdoor entertaining. I'm David Shelly, and with nearly two decades of hands-on construction and landscape experience, I've learned that proper planning is essential for creating outdoor spaces that stand the test of time.
Why Combine a Paver Patio and Retaining Wall?
Building a paver patio with retaining wall transforms challenging terrain into a personal outdoor sanctuary, delivering both practical solutions and stunning visual appeal. This integrated approach creates a complete outdoor living solution that tackles multiple challenges at once. By combining these two features, you invest in increased usable space, soil erosion control, improved drainage, and aesthetic improvement, leading to a significant property value increase and long-term durability.
Functional Benefits for Sloped Yards
Sloped yards often suffer from soil erosion, limited flat areas, and water runoff issues. A retaining wall manages soil pressure, holding back earth that would otherwise slide downhill. A properly designed wall with drainage can reduce soil pressure by up to 30%, creating a stable foundation. This combination creates level surfaces where none existed, often increasing flat areas by 50% on sloped properties. The retaining wall also prevents water damage by directing runoff away from your home's foundation, while the paver patio's built-in slope controls runoff naturally, eliminating muddy messes.
Aesthetic and Value-Added Advantages
Beyond solving practical problems, this pairing creates an outdoor sanctuary. The retaining wall acts as natural architecture, creating defined living zones. You can incorporate seating walls for extra guest seating or design tiered garden beds. The architectural interest from curves, straight lines, and integrated lighting can transform an ordinary backyard into a magazine-worthy space. Financially, well-executed hardscaping projects typically see 100-200% cost recovery at resale. Quality retaining walls can last over 50 years, and paver patios easily exceed 20 years of service, offering far greater durability than wooden decks that require constant maintenance.
For more information on how we can transform your outdoor space with these durable and beautiful solutions, check out our dedicated Landscaping services.
Planning and Design: Your Project Blueprint
Proper planning is the foundation for a successful paver patio and retaining wall project. This phase ensures your outdoor space is both beautiful and built to last, avoiding common issues like poor drainage or structural problems. The first step is a thorough site assessment to understand your soil type, the degree of slope, and any underground utilities. Calling 811 before any digging is critical to avoid hitting utility lines. We also review local regulations regarding drainage impact and design complexity, as some communities have strict rules based on wall height or proximity to property lines.
Key Design Considerations for Building a Paver Patio with Retaining Wall
Bringing your vision to life involves balancing dreams with practical considerations. Layout and flow are key; we design the space based on how you'll use it, whether for large gatherings or quiet relaxation. The shape of the retaining wall is also important. Curves versus straight lines offer distinct styles; flowing curves create a natural feel, while straight lines provide a clean, contemporary look. On steeper slopes, steps and tiers add visual interest while maximizing usable flat space. Integrated features like built-in seating walls, fire pits, and strategic lighting can lift the project from a simple patio to a true outdoor room. We can even provide 3D renderings so you can visualize the completed project.
Permits, Materials, and Budgeting
Navigating the practicalities of permits and materials is crucial. Permit requirements vary, but most communities require them for walls over 4 feet high. Some jurisdictions have stricter rules, and taller walls often have engineering needs. We handle all permit paperwork for our clients, navigating local codes to ensure compliance. Material selection impacts both budget and appearance. Interlocking concrete blocks are versatile and cost-effective, while natural stone offers timeless beauty at a premium price.
| Material Type | Application | Cost (per sq ft)* | Durability | Style Notes |
|---|---|---|---|---|
| Interlocking Concrete | Walls & Pavers | $15-25 (walls) | Excellent | Versatile, wide range of colors & textures |
| $6-12 (pavers) | ||||
| Natural Stone | Walls & Pavers | $45-75 (walls) | Excellent | Timeless, organic, unique, luxury option |
| $18-36 (pavers) | ||||
| Clay Brick | Pavers | $6-12 (pavers) | Exceptional | Classic charm, traditional look |
*Note: Costs are approximate material costs and do not include labor or base materials.
Regarding DIY versus professional costs, labor typically represents 50-60% of the total project cost. While DIY can save money upfront, this work is physically demanding and requires specialized tools and precise execution. Mistakes in drainage or base preparation can lead to costly future repairs. For most projects, professional installation guarantees results and provides peace of mind.
For concrete-related services that might complement your patio project, explore our Concrete Services page.
The Construction Process: A Step-by-Step Guide to Building a Paver Patio with Retaining Wall
The construction phase brings your design to life. This process requires precision, the right tools, and a focus on safety. A typical residential building a paver patio with retaining wall project takes 1-2 weeks, depending on size and complexity. Our tool checklist includes everything from excavators to string lines, and safety gear is always a priority.
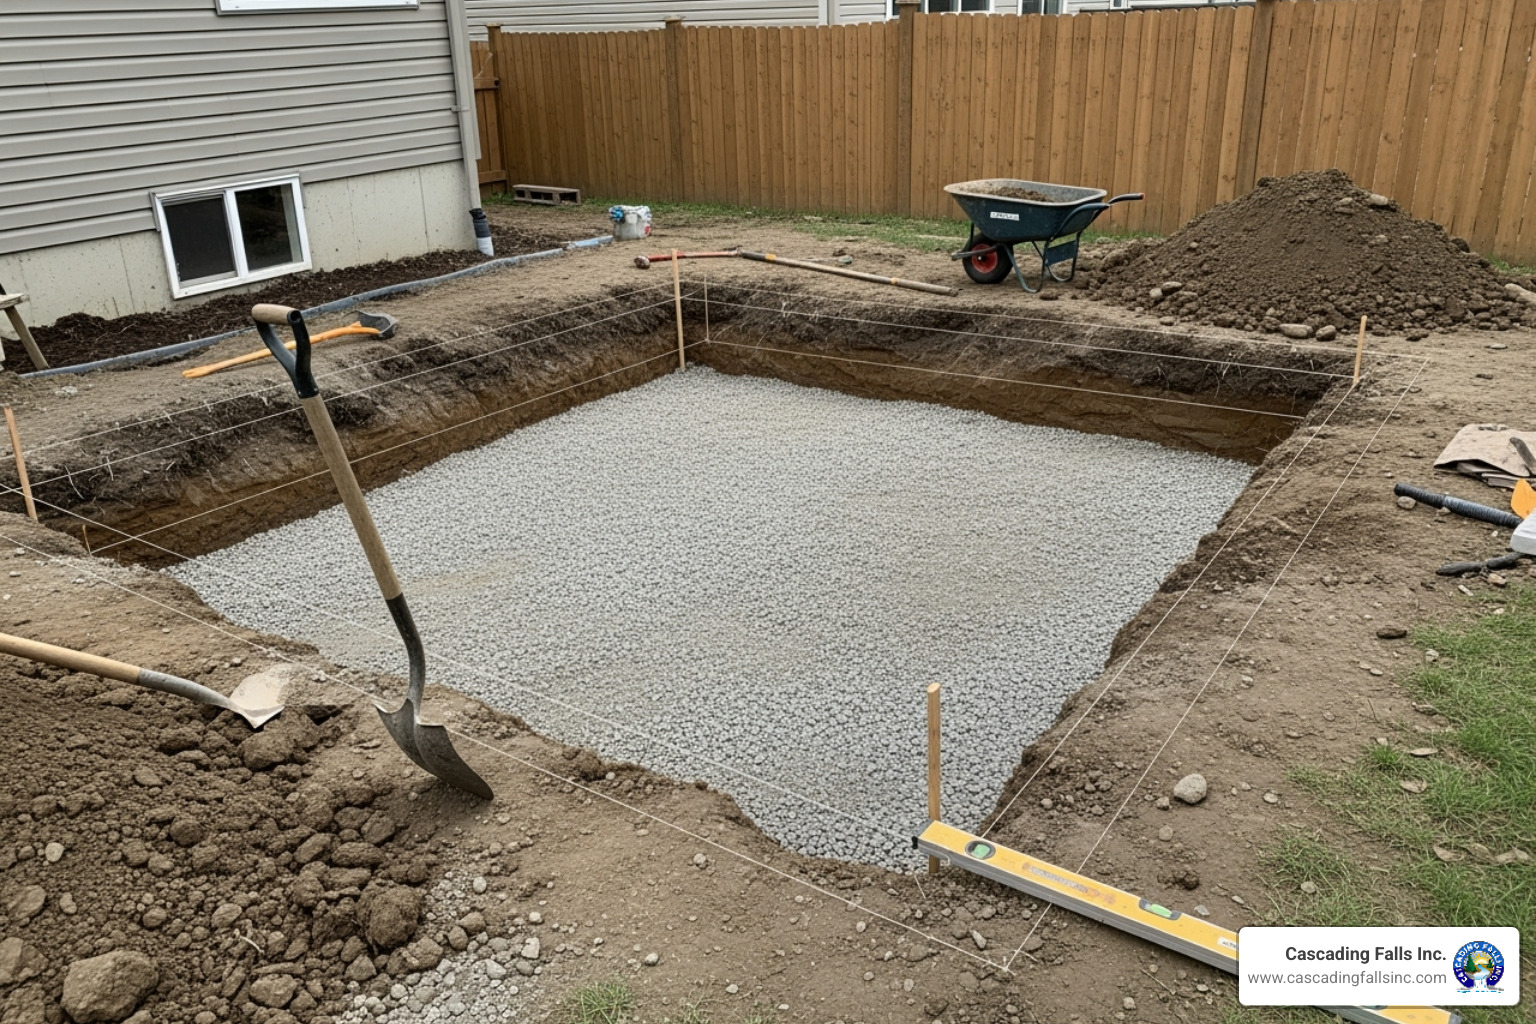
Step 1: Site Preparation and Excavation
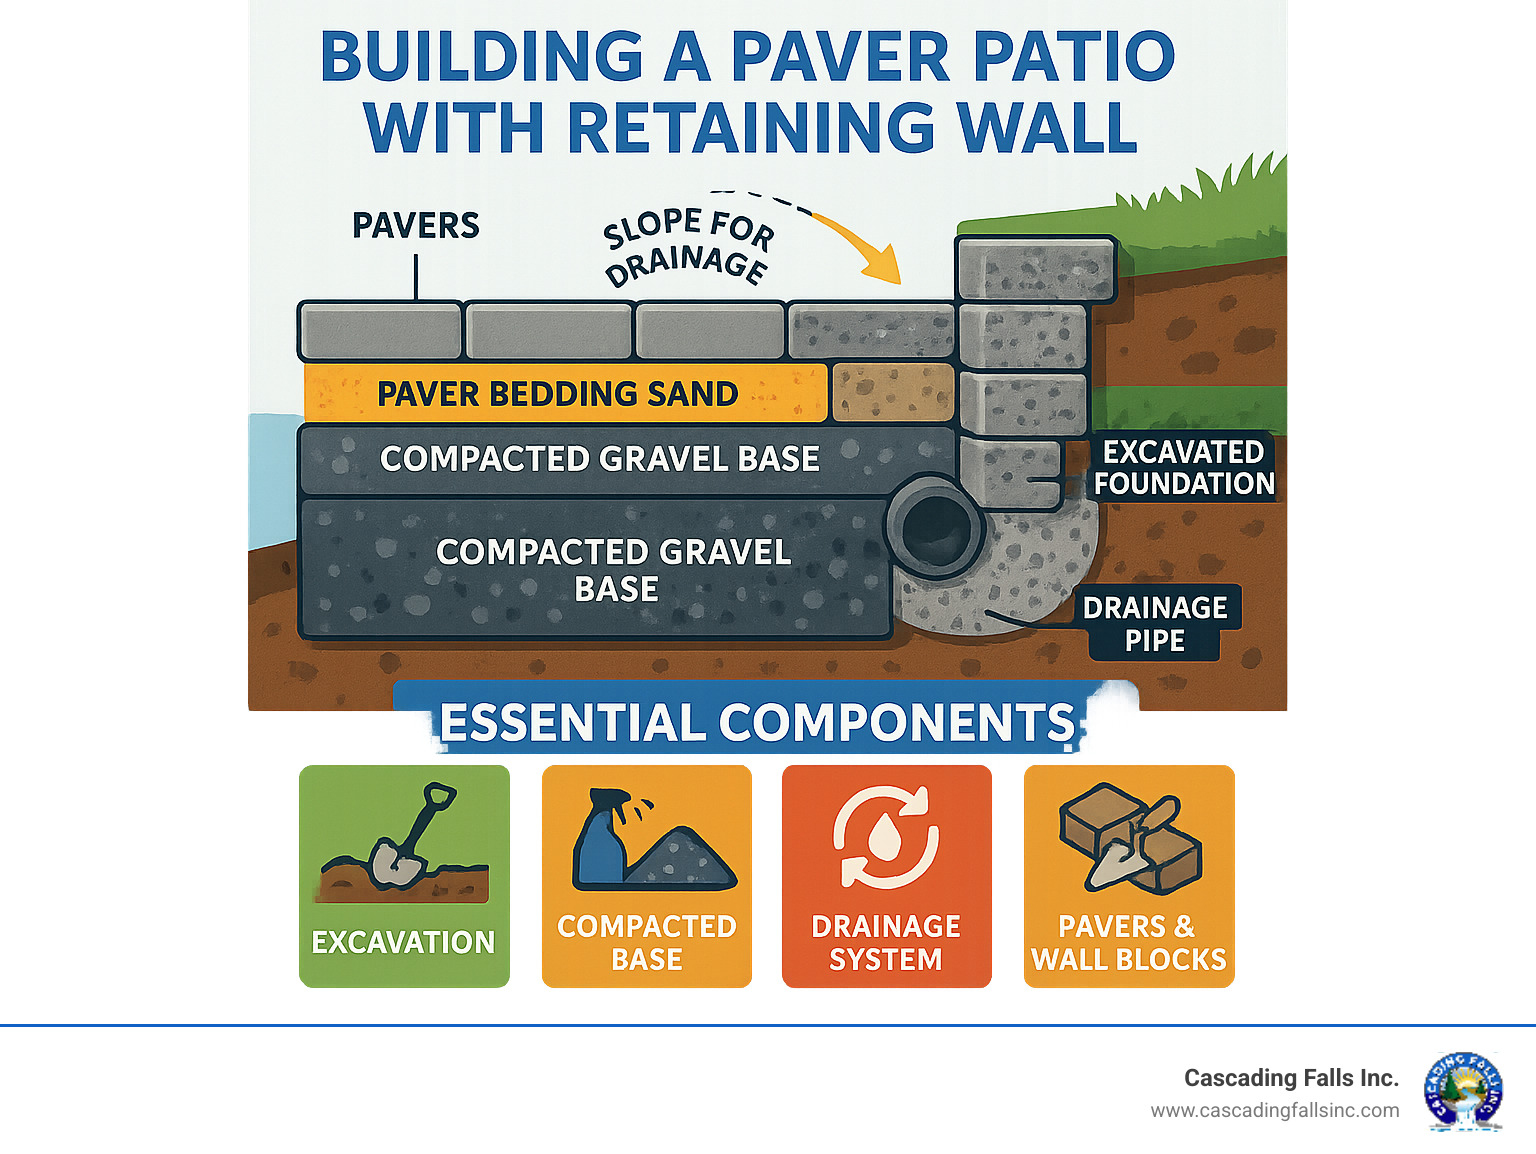
Proper site prep is essential for a long-lasting project. We begin by marking the layout with paint and string lines. Excavation depth is critical: about 6-8 inches for the patio base plus paver thickness, and a deeper trench for the wall foundation (at least 6 inches deep, plus 1 inch for every foot of wall height). All organic topsoil is removed, and we establish the grade with a consistent 1-2% slope for drainage away from your house. Finally, we compact the sub-base with a plate compactor to prevent future settling.
Step 2: Building the Retaining Wall
The retaining wall is the structural hero of the project. We start with trench excavation and install a 4-8 inch compacted gravel base. The first course installation is the most critical step; these blocks are partially buried and must be perfectly level. Behind the wall, we install a drainage system consisting of a perforated pipe, clean drainage stone, and filter fabric to prevent clogging. This system relieves hydrostatic pressure, which can destroy a wall. As we build higher, we backfill in lifts with more drainage stone and stagger the blocks for structural integrity. For walls over 4 feet, geogrid reinforcement is often used to provide additional stability.
For more background on retaining wall structure and design, visit the Retaining wall Wikipedia page.
Step 3: Installing the Paver Patio
With the wall complete, it's time to install the patio.
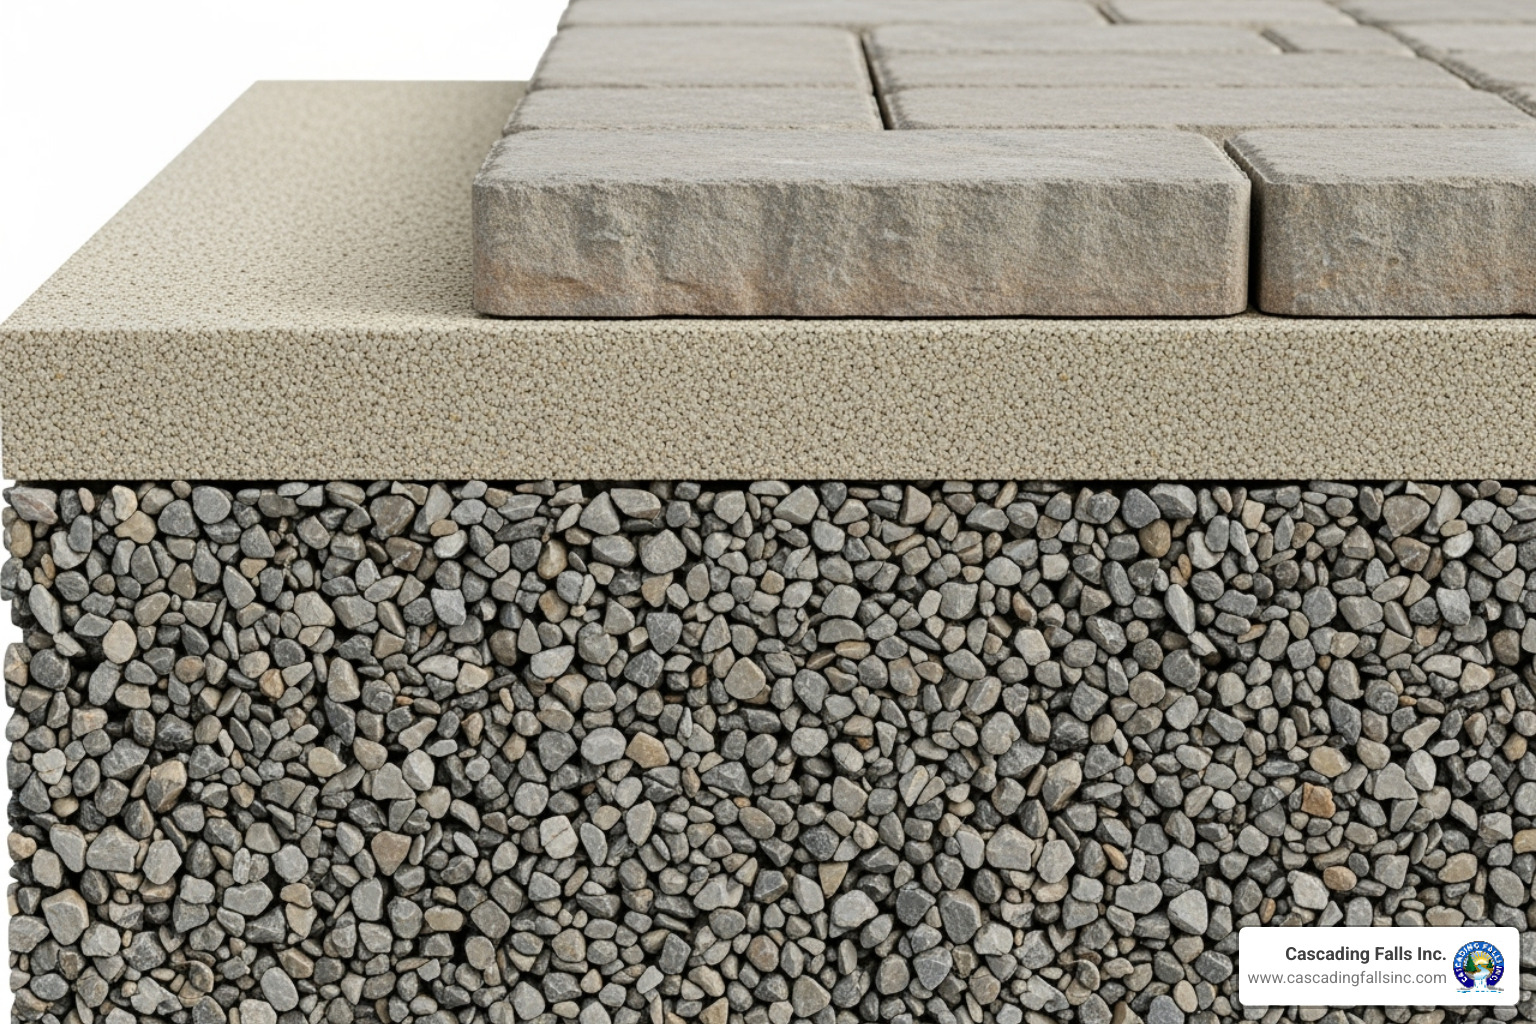
We install 4-6 inches of paver base material(compacted gravel) over the patio area. On top of this, we spread a 1-inch layer of bedding sand, using screed rails to create a perfectly smooth surface. We then begin laying pavers from a fixed edge, working outward and ensuring tight joints. Edge restraints are installed around the perimeter to prevent shifting. A masonry saw is used for cutting pavers to fit curves and edges. Finally, polymeric sand is swept into the joints, followed by final compaction. A light mist of water activates the sand, locking the pavers in place and inhibiting weed growth.
Maintenance and Longevity: Protecting Your Investment
A paver patio with a retaining wall is a durable investment that benefits from simple, regular care. With proper maintenance, your outdoor sanctuary will provide joy for decades, and the upkeep is easier than you might expect.
Routine Care and Inspections
The key to a long-lasting building a paver patio with retaining wall project is staying ahead of small issues. We recommend seasonal checks, especially in spring and fall, to look for shifted blocks, heaved pavers, or clogged drainage outlets. Clearing drainage outlets is crucial; a clogged pipe can lead to water buildup and wall failure. While polymeric sand helps with weed prevention, pull any stubborn weeds promptly. For spot cleaning spills, act fast to prevent staining. A gentle annual pressure wash is one of the best cleaning methods to keep your patio looking fresh.
Addressing Settling, Movement, and Repairs
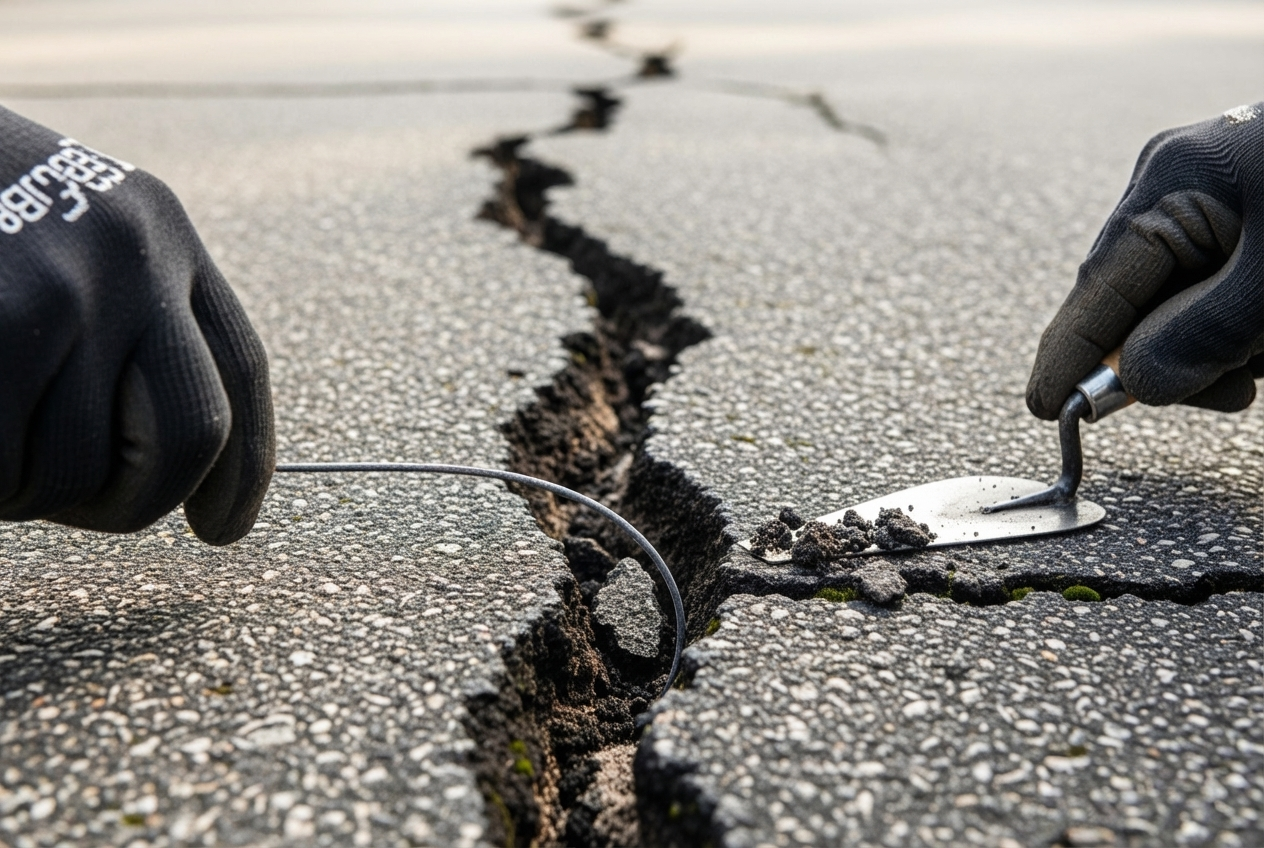
Even well-built structures can have minor issues over time. Fixing heaved pavers or re-leveling settled areas is usually straightforward. We can remove the affected pavers, adjust the base material, and reinstall them. When monitoring wall integrity, pay close attention to any cracks or movement during your seasonal inspections. If you see significant structural changes, call a professional immediately for an evaluation. Resealing pavers every 3-5 years is also recommended. This process improves color, prevents stains, and helps lock in the joint sand, giving your patio a renewed look.
Frequently Asked Questions about Building a Paver Patio with Retaining Wall
Here are answers to common questions homeowners have when considering building a paver patio with retaining wall.
Do I need a permit to build a retaining wall with a paver patio?
It depends, but it's likely. The general rule is that walls over 4 feet high require permits. However, even shorter walls may need a permit depending on property line proximity or drainage impact on neighboring properties. Taller or more complex walls often have engineering needs that require stamped plans. We handle navigating local municipal codes and all permit paperwork for our clients to ensure full compliance and avoid future issues.
How do I ensure proper drainage for the entire structure?
Proper drainage is non-negotiable. For the patio, we create a gentle patio slope of 1-2% away from your house to direct water away from the foundation. For the wall, a complete wall drainage system is essential. This includes a perforated drainage pipe at the base, a backfill of clean gravel, and filter fabric to prevent clogs. The system terminates at a daylight outlet, allowing water to escape and preventing hydrostatic pressure that can cause wall failure. Skipping this step is a common and costly mistake.
What is the cost difference between DIY and professional installation?
Labor costs typically represent 50-60% of the total project investment. While DIY saves on this cost, it comes with other expenses like tool rental and a significant time commitment. The complexity factor is high; creating proper grades, curves, and cuts requires skill. The biggest consideration is the risk of errors versus guaranteed work. Mistakes in drainage or compaction can lead to expensive failures down the road. Professional installation provides peace of mind and a guarantee, making it a wise investment for most homeowners.
Conclusion
Building a paver patio with retaining wall transforms a challenging slope into a functional and beautiful outdoor sanctuary. This integrated solution prevents soil erosion, manages water drainage, and creates valuable level space for entertaining. The functional and aesthetic rewards are immediate, and the project can recover 100-200% of its cost at resale, making it a smart financial investment.
The construction process requires precision, from proper excavation to installing comprehensive drainage systems. While DIY is an option, the complexity often makes professional expertise a worthwhile investment to avoid costly future repairs.
At Cascading Falls Inc., we've guided countless homeowners through successful hardscaping projects across Roseville, Sacramento, and throughout California. Our "Whatever It Takes..." approach means we handle every detail, from permits to final cleanup, ensuring your project exceeds expectations.
Ready to transform your challenging slope into your favorite outdoor retreat? Contact us to start planning your landscaping project and find how we can bring your vision to life.

