Why Professional Shade Structure Installation Creates Cool, Valuable Outdoor Spaces
Shade structure installation transforms your outdoor space into a comfortable, valuable retreat. Whether you're planning a DIY project or hiring professionals, understanding the process is key for success.
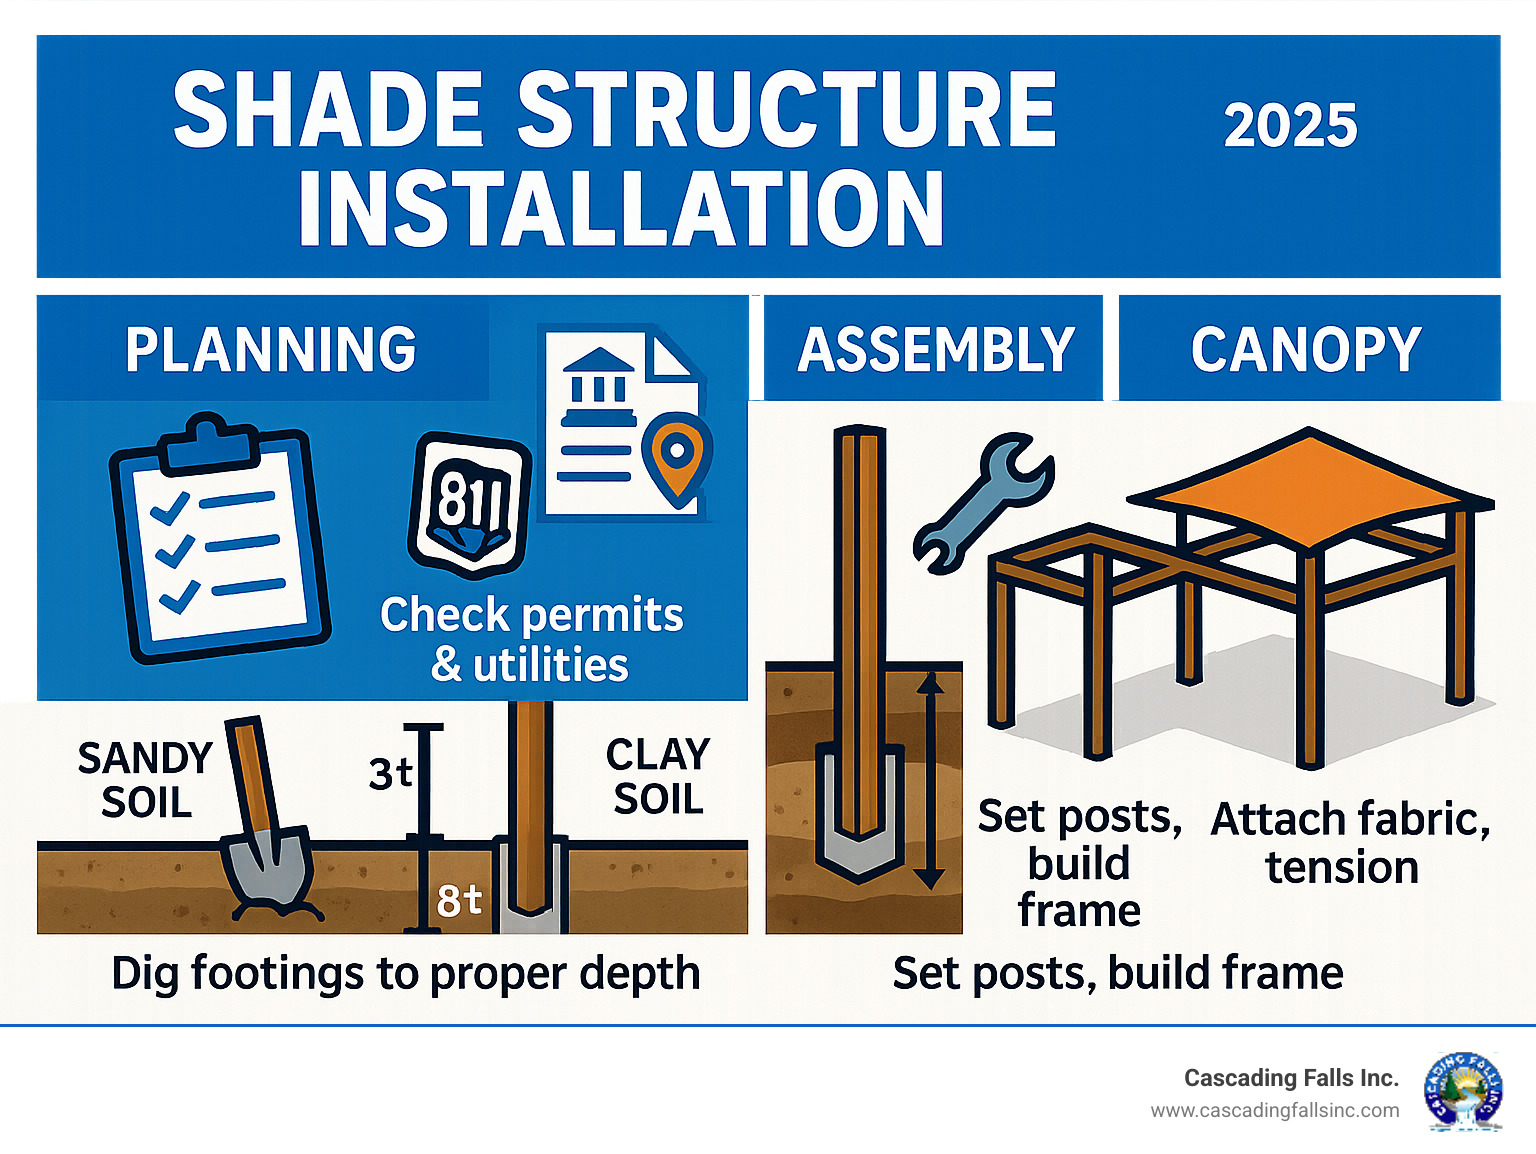
Key Steps for Shade Structure Installation:
- Planning- Check permits, call 811 for utilities, choose location
- Foundation- Dig footings 3-8 feet deep, install posts with concrete
- Assembly- Build frame, ensure posts are level and secure
- Canopy- Attach fabric with proper tensioning for durability
The installation process varies by structure. Simple shade sails can be DIY projects, while commercial cantilevers require professional expertise and heavy equipment. Shade structures are a practical investment, proven to reduce temperatures by up to 20 degrees and block up to 98% of harmful UV rays.
Many underestimate the complexity. As one industry expert noted, "Many people underestimate the complexity and cost of shade structure installation, thinking it's similar to installing a playground or tent." Permanent installations often require engineering drawings, permits, and robust footings to handle wind loads safely.
I'm David Shellu, and with nearly two decades in construction and landscape design, I've guided countless clients through successful shade structure installation projects, from simple residential sails to complex commercial installations, ensuring every project meets aesthetic and safety standards.
Planning Your Shade Structure Project: From Location to Legality
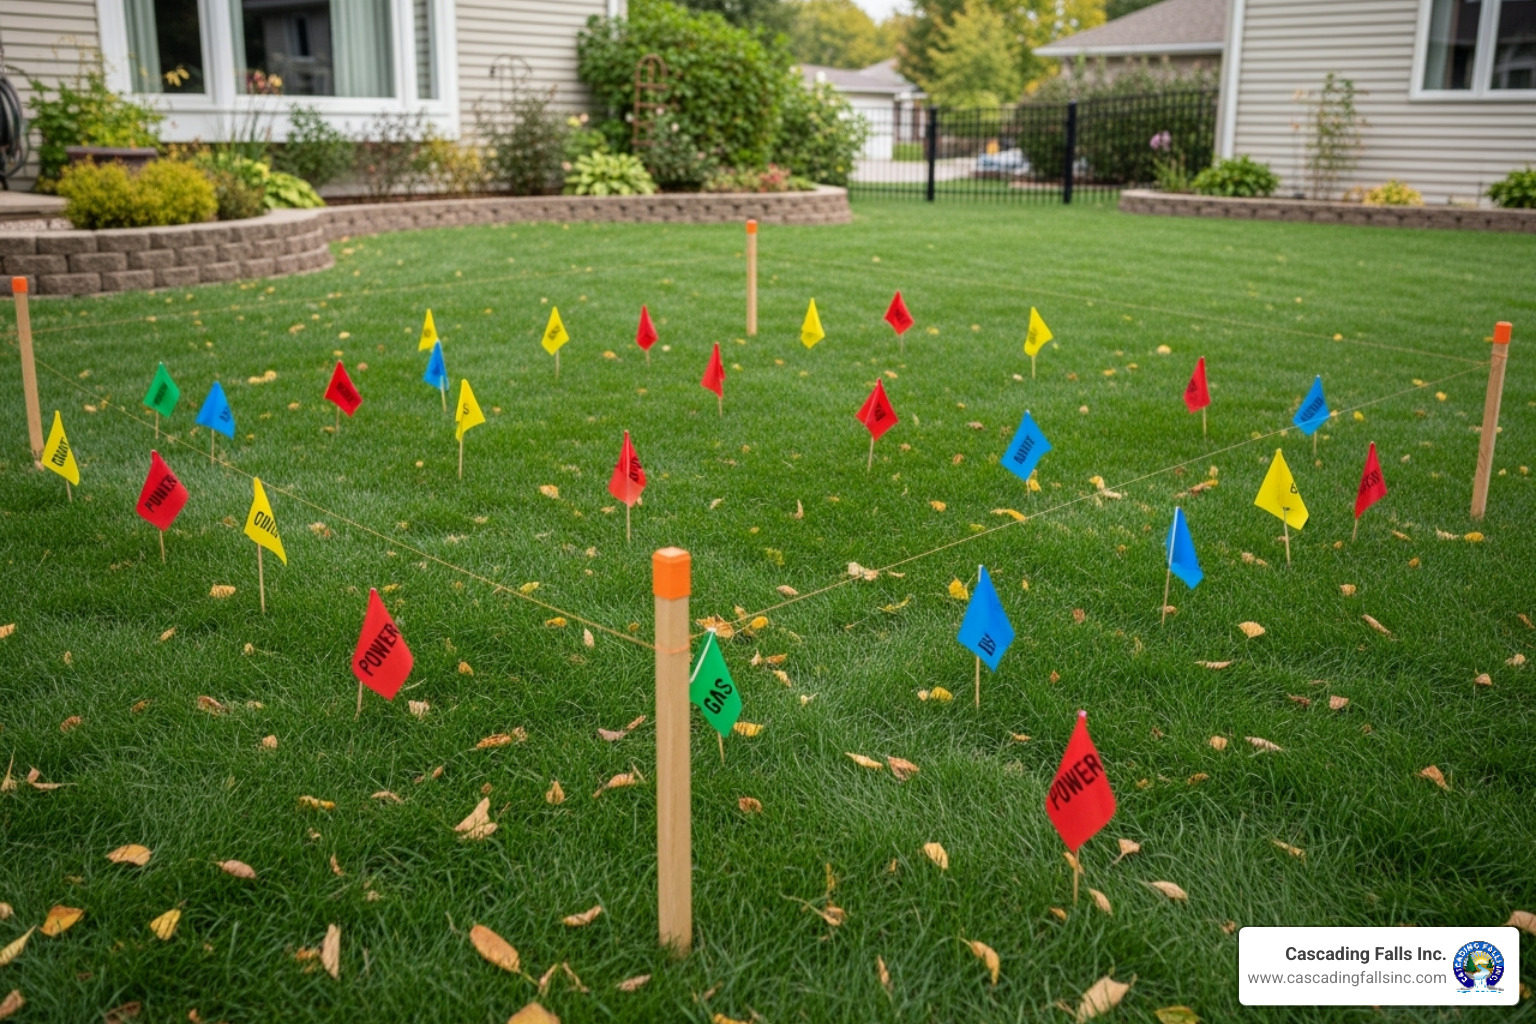
Planning your shade structure installation is like preparing for a road trip—a little upfront work prevents costly detours. Many homeowners underestimate these projects, encountering unexpected underground utilities, permit requirements, or soil issues. Following these essential planning steps separates a successful installation from an expensive mistake.
Choosing the Perfect Spot
Finding the right location is part science, part art. You want maximum comfort and a look that belongs in your outdoor space.
Start with a sun path analysis by observing your yard at different times. This reveals exactly where and when you need shade most. Also, consider wind direction, as strong gusts can stress the structure. Think about visitor traffic to ensure the structure improves flow, not hinders it. Its proximity to the house should be convenient but still create a distinct outdoor room.
Finally, ensure the available space accommodates the structure with safe clearances. Aesthetic integration is key; the structure should feel like a natural extension of your home. For complex projects, our Landscaping Services can help create perfect harmony.
Understanding Local Regulations and Permits
This is where cutting corners gets expensive. Permanent shade structures are construction projects with legal requirements.
Permit requirements vary by location, but most permanent structures need them. Homeowner associations (HOA) often have their own rules, so check both. Before digging, you must respect property lines and utility easements.
Two calls are critical before you break ground:
Calling 811 is a free, mandatory service that marks underground utilities (gas, electric, water). Hitting a line is dangerous and expensive.
Next, contact your local building department about local building codes. Many projects require sealed engineering drawings —plans stamped by a licensed engineer proving the structure can handle local wind and snow loads. This is a safety requirement, not red tape. For reference, State building requirements vary, and here in California, California's Division of the State Architect sets stringent codes.
These requirements affect project lead times. Standard structures might take 4-6 weeks to manufacture, while custom designs with engineering can take 8-16 weeks. Plan accordingly to have your shade ready for summer.
Choosing Your Shade Structure: Types and Materials
With a solid plan, you can choose the perfect shade structure. Each type offers a unique blend of aesthetics, function, and installation needs.
| Feature | Shade Sails | Pergolas (Vinyl/Wood) | Cantilever/Fixed-Frame Structures |
|---|---|---|---|
| DIY-Friendliness | Moderate (smaller sails) to Low (complex) | Moderate (kits) to Low (custom builds) | Very Low (requires professional installation) |
| Cost | Lower (sails) to Moderate (posts/hardware) | Moderate (kits) to High (custom, materials) | High (complex footings, heavy materials, labor) |
| Maintenance | Moderate (cleaning, tension checks, removal) | Low (vinyl) to Moderate (wood sealing, cleaning) | Low (durable materials, professional cleaning) |
| Coverage | Partial, flexible, artistic | Partial (open roof) to Full (with cover) | Full, unobstructed below, often large-scale |
Let's explore your options.
Shade Sails
Shade sails are curved fabric membranes stretched between anchor points to create artistic, sculptural shapes. Their HDPE fabric(high-density polyethylene) blocks up to 98% of UV rays and provides 95% shade. It also allows about 60-70% of rainwater to run off.
Using multiple anchor points at different heights creates beautiful hyperbolic shapes that are both aesthetic and functional, helping shed water. Shade structure installation for sails requires serious tensioning hardware like turnbuckles and stainless steel cables. While small sails can be DIY projects, larger installations need professional help to achieve the correct tension.
Pergolas and Patio Covers
Pergolas are a classic choice for creating defined outdoor rooms. The main decision is vinyl vs. wood. Vinyl is low-maintenance, resisting rot and warping. Wood, like cedar or treated pine, offers natural warmth but requires more upkeep.
Pergolas offer great design flexibility. You can grow vines on them, add shade cloth, or install adjustable louvered roofs. They also provide structural support for climbing plants or lights. Installation ranges from DIY-friendly kits to custom builds requiring skilled carpentry, but both need solid footings. For custom designs, see our custom structures.
Cantilever and Fixed-Frame Structures
These are the heavy-duty options, perfect for creating unobstructed space over pools or parking. Heavy-duty posts on one side support the entire canopy, but this design requires complex footings to handle the stress.
Professional design is essential. These structures need sealed engineering drawings and often require footings 6-8 feet deep to manage wind loads safely. Installation involves heavy equipment and construction-grade techniques. Material durability is key, with steel frames and commercial-grade fabrics being standard. They are a significant investment in comfort and property value that requires professional expertise.
The Ultimate Guide to Shade Structure Installation
Now for the exciting part: the actual shade structure installation. Whether you're tackling a DIY project or working with our team, understanding these steps ensures a smooth process.
Essential Tools and Equipment for the Job
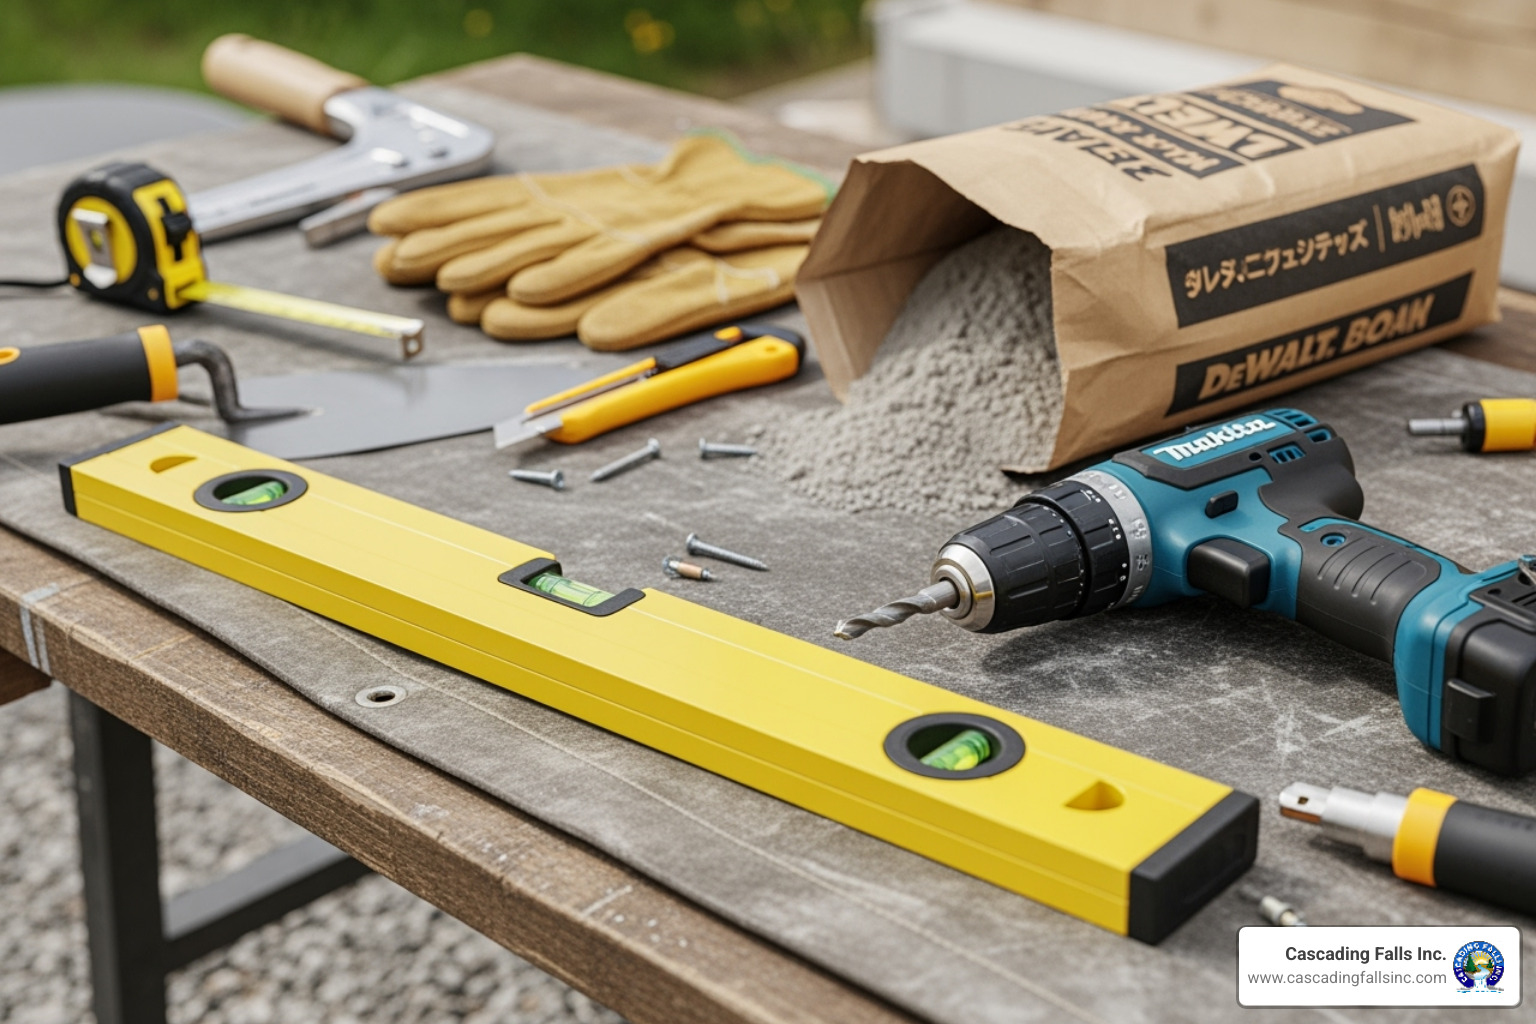
Having the right tools is the difference between a smooth project and a month-long headache. Being properly equipped is essential.
For hand tools, you'll need a measuring tape, a level, a ratchet set, and a drill. A post-hole digger or auger will save your back, along with shovels, hammers, and utility knives.
For heavy equipment, larger projects often need a skid steer with an auger attachment for digging footings, a concrete mixer, and a scissor lift for safety with tall structures. We also use concrete vibrators to ensure footings cure without air pockets.
Safety gear is not optional. Always use work gloves, safety glasses, and sturdy boots. For larger jobs, add hard hats and hearing protection.
Step 1: A Rock-Solid Foundation for Your Shade Structure Installation
Your foundation is everything. Skimping here is a costly mistake, as wind loads can turn a shade structure into a powerful sail that will test every anchor point.
In-ground footings are standard for permanent structures. We dig 6-8 feet for commercial structures or 3-4 feet for smaller DIY projects, depending on the frost line and soil. The process involves precise excavation (after calling 811!) and placing rebar cages for reinforcement.
For existing concrete, surface mounts can work if the slab is thick enough. Recessed base plates offer a clean look, while spread footings distribute weight in challenging soil.
The installation requires patience. After digging, we set each post perfectly plumb with temporary braces. Then we pour the concrete, using a concrete vibrator to remove air pockets. You must wait for the 48-hour cure time before proceeding.
Step 2: Assembling the Posts and Frame
Once the concrete has cured, it's time to build the frame. Precision is critical here.
Setting posts vertically and ensuring they are level and aligned requires careful measurement. We use bracing techniques until the entire frame is assembled for support. For attaching rafters and beams, we sometimes assemble sections on the ground first, then lift them into place with equipment for better safety and precision.
During frame assembly, we constantly check that everything is level and square, tightening every connection properly.
Step 3: Attaching and Tensioning the Canopy
This final step brings your shade structure to life. For shade sails, we feed the perimeter cable through the hem and use tensioning hardware like turnbuckles to achieve tautness. A come-along tool(hand winch) may be needed for larger sails.
Fixed canopies use hardware like Glide Elbows. We insert the fabric cable, hook it to connection points, and use power tools to tighten everything. The key to any canopy is even tensioning. The canopy should be firm like a drum, with no sagging, to prevent water pooling and extend its life. This even tension is what prevents sagging and protects your investment from wind damage.
For areas with extreme weather, we recommend quick-release systems to easily remove the canopy before severe storms or heavy snow.
Common Mistakes and Post-Installation Care
Even with good intentions, mistakes happen during shade structure installation. Learning from common errors can save you time, money, and frustration.
Top Mistakes to Avoid in Your Shade Structure Installation
- Inadequate measurements: The adage "measure twice, cut once" is critical. Being off by even a few feet can result in expensive do-overs and delays.
- Weak anchor points: Your structure is only as strong as its weakest connection. Attachment points must be rock-solid and anchored to something substantial, not a decorative post.
- Ignoring building codes: This is a safety and legal risk. Structures not built to code can fail, putting people and property in danger, and may result in fines.
- Poor location choice: Consider how the space will function year-round. Avoid areas that become swampy in winter or block a favorite view.
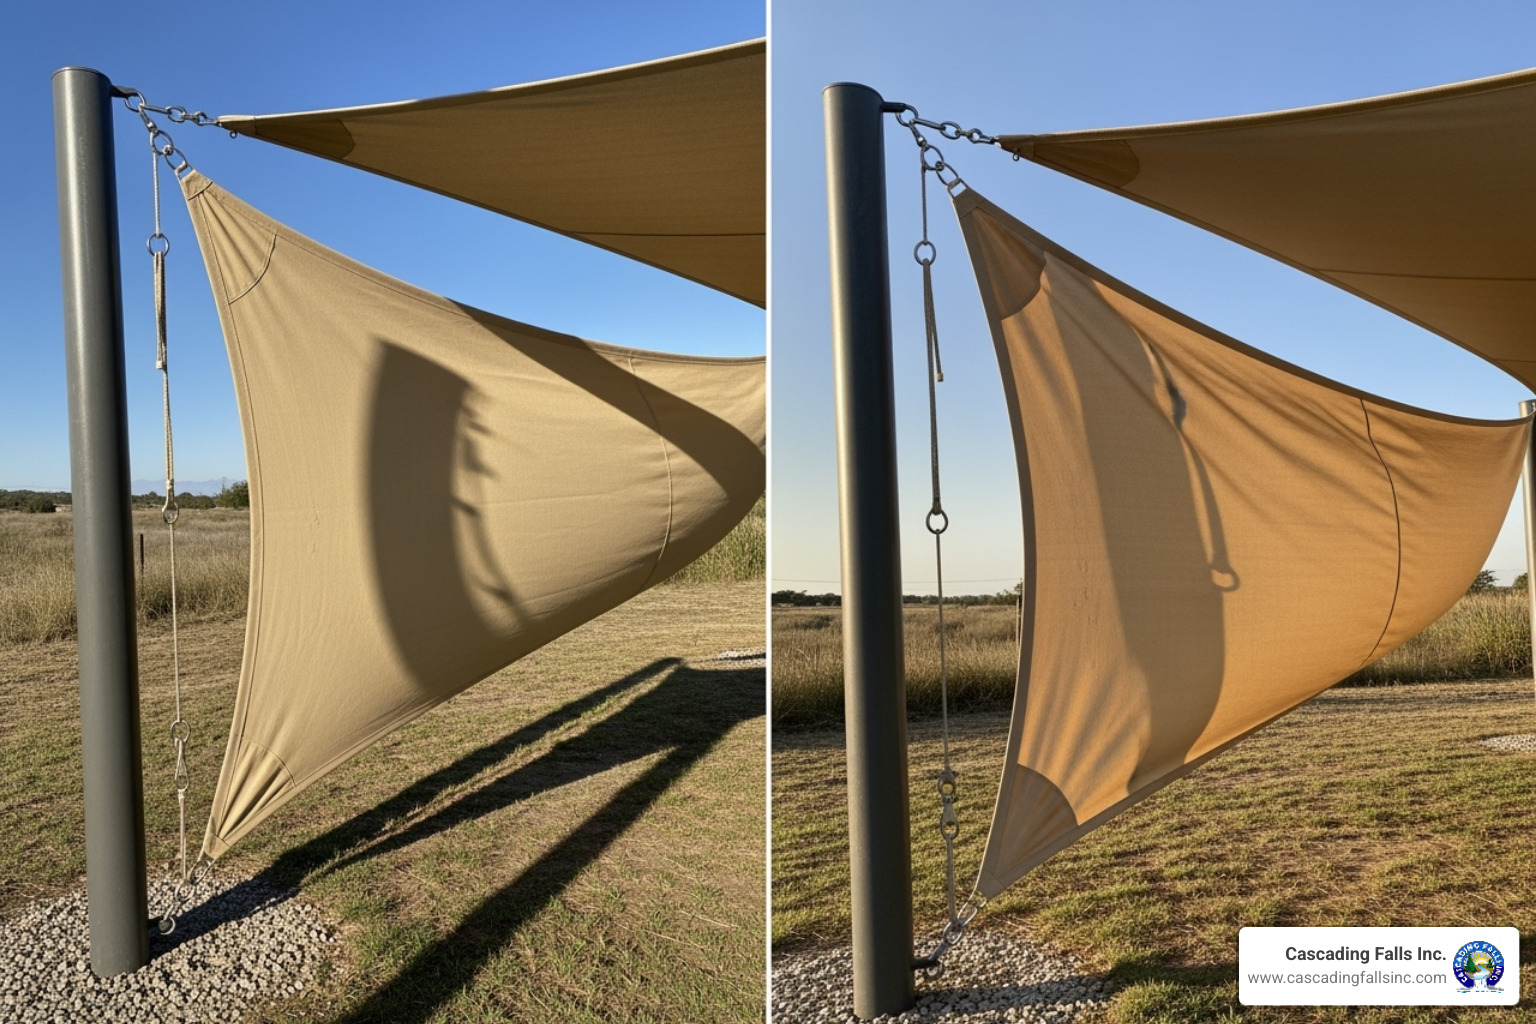
- Improper fabric tension: Fabric that is too loose will flap, collect water, and wear out quickly. Over-tightening can tear the fabric or stress the hardware. Aim for a "drum-tight" feel.
- Underestimating the project complexity: Permanent installations are serious construction projects, not oversized tents. They often require heavy equipment and professional skills, highlighting the difference between DIY and professional installation.
Keeping Your Shade Structure Safe and Secure
Your shade structure installation journey continues after the last bolt is tightened. Proper maintenance is key to longevity.
Regular inspections are essential. Every few months and after big storms, check for loose hardware, fraying fabric, or signs of wear.
For cleaning the fabric, use a garden hose and mild dish soap. Avoid pressure washers or harsh chemicals that can damage the UV coating. A soft brush is usually sufficient.
Remember to check hardware like turnbuckles and bolts, as they can loosen over time. A little grease on turnbuckle threads annually prevents seizing.
In areas with extreme weather, removing the canopy before heavy snow or hurricane-force winds is a wise precaution. A quick-release system simplifies this.
Finally, understand your warranty information. Most quality fabrics have long warranties that are contingent on proper care.
At Cascading Falls Inc., our "Whatever It Takes..." approach means we're here for the long haul. Learn more about our commitment on our About Us page.
Frequently Asked Questions about Shade Structure Installation
Over the years, certain questions about shade structure installation come up repeatedly. Here are the answers to the most common ones.
How deep do footings need to be for a shade structure?
Footing depth is critical and depends on the structure's size, local soil type, and regional frost line. While smaller DIY projects may only need 3-4 foot deep footings, commercial-grade or large residential structures require footings 6-8 feet deep to handle significant wind loads. A shade structure acts like a sail; without a deep enough foundation, wind can lift it from the ground. Always follow manufacturer specifications or sealed engineering plans, which account for your specific site conditions. It's always better to overbuild your foundation.
Are shade sails waterproof?
Most high-quality shade sail fabrics like HDPE (High-Density Polyethylene) are water-resistant, not fully waterproof. This is by design, as the permeable fabric allows for excellent airflow and cooling. When installed correctly with a 25% tilt for optimal water runoff, most rainwater will shed off. During heavy downpours, a fine mist may pass through. If complete waterproofing is necessary, specific waterproof fabrics are available, but they require steeper installation angles to prevent water from pooling.
How do I know if my shade sail has enough tension?
A properly tensioned shade sail should feel taut and firm, like a drum skin. There should be no wrinkles, creases, or sagging where water could collect. If you see sagging or flapping in light breezes, you need more tension. Use hardware like turnbuckles to tighten the sail gradually until all wrinkles disappear. Proper tension prevents water pooling, reduces wear from flapping, and helps the structure handle wind loads effectively. The goal is to find the sweet spot between eliminating sag and over-stressing the fabric or hardware.
Conclusion
A shade structure installation transforms your outdoor space, offering cooler temperatures, UV protection, and an inviting extension of your home. Whether it's a simple shade sail or a robust commercial canopy, the rewards are significant.
As we've covered, planning and preparation are key. From analyzing sun paths to calling 811 and navigating building codes, every step is crucial. The foundation is the most critical part of the installation, providing the strength to withstand wind and weather for years to come.
DIY installation can be rewarding for smaller projects if you have the right tools and skills. However, for larger or more complex structures, professional help ensures safety, compliance, and a lasting result. The cost of professional installation is an investment in the safety and longevity of your structure.
At Cascading Falls Inc., our "Whatever It Takes..." philosophy means we handle the complexities of installation so you can enjoy the results. We've perfected the art of installing everything from delicate shade sails to massive cantilever systems.
Remember to plan for manufacturing times. Standard shade structures often need 4-6 weeks, while custom designs with engineering can take 8-16 weeks before installation begins. Start planning early to beat the summer heat!
Ready to create your perfect shaded retreat? Contact Us today for a consultation, or View Our Services to explore how we can bring your outdoor vision to life.

